


Merhaba,
Bu yazımda Angular ortamında bir custom http servisinin hazırlanmasından ve kullanımından bahsedeceğim. Genel olarak bir CRUD(Create, Read, Update, Delete) işlemi yapacağımız zaman http requestlerine ihtiyacımız olur. Bu ihtiyacımız olduğu zaman sürekli CRUD işlemlerini yapabilmek için http methodları olan GET, POST, PUT, PATCH, DELETE methodlarını kullanırız. Projemiz içinde nerede ihtiyacımız olursa orada Angular içinde tanımlı olan HttpClient servisini inject edip onun yardımı ile CRUD operasyonlarımızı yapabiliriz. Bu yöntemin kullanımında bizim işimizi artıran tarafı ise, yapmış olduğumuz requestlerde ihtiyaç olan parametre değişimleri ya da model düzenlemeleri gibi aşamalarda proje içinde HttpClient kullandığımız her yerde tek tek bu düzenlemeyi yapmamızın gerekliliğidir.
Bu tarz işlemlerden kurtulma, kolay bakım ve kod okunabilirliği açısından kendimize ait custom bir http servisi hazırlayabiliriz. Bize ait bir custom http servisi olduğunda ise artık var olan ihtiyaca göre düzenlememizi bu servis içinden yapıp projenin geri kalanında http servisi kullandığımız noktalara müdahale etmemize gerek kalmamasınız.
Şimdi kendimiz servisimizi oluşturalım ve kullanımına göz atalım. İlk olarak projemizde src/app klasörü altında services adıyla bir klasör oluşturup içine de custom-http.service.ts adıyla dosyamızı ekleyelim. Servis dosyamızın içinde constructor methodundan Angular HttpClient servisini inject edip ihtiyacımız olan methodlarımızı generic tip alacak şekilde yazalım. Bizim ihtiyacımız olan CRUD işlemlerini yönetebilmek için ilgili http methoduna karşılık verecek kendi servisimize ait methodlarımızı yazmak olacaktır. Bu methodlarıda makeGetRequest, makePostRequest, makePutRequest, makePatchRequest, makeDeleteRequest olarak isimlendirebiliriz.
- Get methodu bize sistemde kayıtlı olan verileri getir.
- Post methodu ise sisteme yeni kayıt atmamızı sağlar.
- Put methodu ile sisteme kayıt atarken kontrol işlemi yapılır, eğer kayıt varsa güncellenir, kayıt yoksa yeni kayıt oluşturulur.
- Patch methodu yardımı ile sistemde kayıtlı olan veri güncellenir.
- Delete methodu ile verilen kayıt sistemden silinir.
Artık servisimizin methodlarına ait gerekli tanımlara sahibiz ve yazdığımız servis aşağıdaki gibi olacaktır.
//custom-http.service.ts
import { HttpClient, HttpResponse } from "@angular/common/http";
import { Injectable } from "@angular/core";
import { Observable } from "rxjs";
import { map } from "rxjs/operators";

@Injectable()
export class CustomHttpService {
  constructor(private httpClient: HttpClient) {}

  public makeGetRequest<T>(url: string): Observable<T> {
    return this.httpClient.get<T>(url, { observe: "response" }).pipe(
      map((res: HttpResponse<T>) => {
        return res.body;
      })
    );
  }

  public makePostRequest<T>(url: string, body?: any): Observable<T> {
    return this.httpClient.post<T>(url, body, { observe: "response" }).pipe(
      map((res: HttpResponse<T>) => {
        return res.body;
      })
    );
  }

  public makePutRequest<T>(url: string, body?: any): Observable<T> {
    return this.httpClient.put<T>(url, body, { observe: "response" }).pipe(
      map((res: HttpResponse<T>) => {
        return res.body;
      })
    );
  }

  public makePatchRequest<T>(url: string, body?: any): Observable<T> {
    return this.httpClient.patch<T>(url, body, { observe: "response" }).pipe(
      map((res: HttpResponse<T>) => {
        return res.body;
      })
    );
  }

  public makeDeleteRequest<T>(url: string, body?: any): Observable<T> {
    return this.httpClient
      .request<T>("delete", url, {
        body,
        observe: "response"
      })
      .pipe(
        map((res: HttpResponse<T>) => {
          return res.body;
        })
      );
  }
}
Servisimiz hazır ve bu servisimizin kullanımını ise onlie bir REST servisi olan typicode/demo adresindeki veriler ile yapacağız. Burada kullanılan veriler için ise kendi projemizde yine src/app altına bir models klasörü ekleyip oranın içerisine de post-request.ts ve post-response.ts modellerimizin tanımını ekleyelim. Gerekli ekleme işlemini yaptıktan sonra ilgili model tanımları aşağıdaki gibi olacaktır. Request modeli için tanım;
//post-request.ts
interface IPostRequest {
  title: string;
}
export class PostRequest implements IPostRequest {
  public readonly title: string;

  constructor(title: string) {
    this.title = title;
  }
}
Response modeli için tanım;
//post-response.ts
interface IPostResponse {
  id: number;
  title: string;
}
export class PostResponse implements IPostResponse {
  public readonly id: number;
  public readonly title: string;

  constructor(id: number, title: string) {
    this.id = id;
    this.title = title;
  }
}
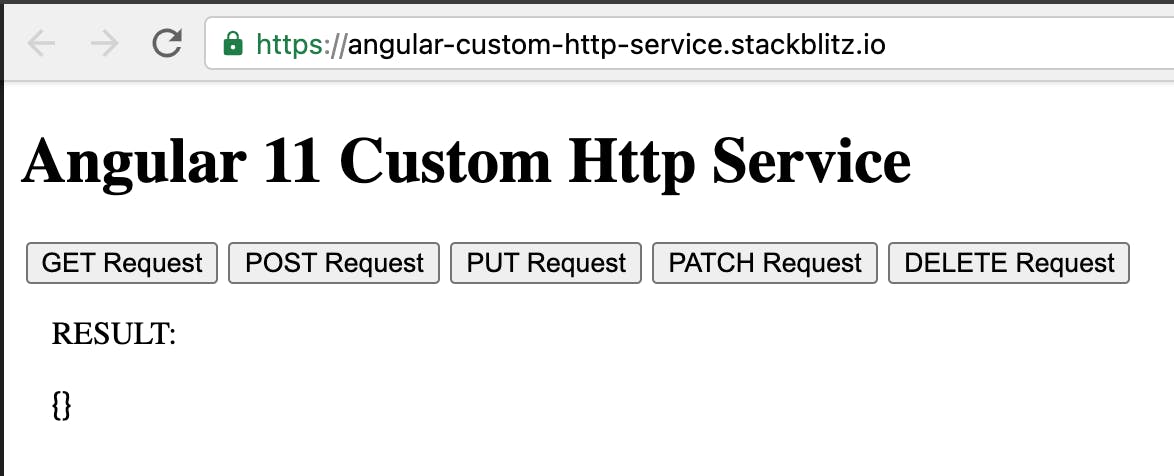
Servisimiz ve bu servis ile kullanacağımız request, response modellerimiz hazır olduğuna göre şimdi kullanım aşamasına geçebiliriz. İlk olarak projemizde var olan app.component.ts içindeki constructor methodumuzda yeni hazırladığımız CustomHttpService servisimizi inject edelim ve sonrasında sırasıyla servisimizin içinde tanımlı olan methodları kullanalım. İlk olarak methodları test etmek için uygulamamızın html tarafına ilgili methodları test etmek için kullanacağımız butonları ve methodların sonucu göreceğimiz bir result kısmını ekleyeylim ve bu işlem sonrasında app.component.html içeriği aşağıdaki gibi olacaktır.
//app.component.html
<h1>{{ title }}</h1>

<button (click)="onGetRequest()">GET Request</button>
<button (click)="onPostRequest()">POST Request</button>
<button (click)="onPutRequest()">PUT Request</button>
<button (click)="onPatchRequest()">PATCH Request</button>
<button (click)="onDeleteRequest()">DELETE Request</button>

<div>
    RESULT:
    <p>
        {{ result | json}}
    </p>
</div>
Artık tek tek methodlarımızın kullanımına ait kodlarımızı ilgili buton click eventine tanımlanmış olan methodlar içerisine yazalım. app.component.ts içerisinde test için kullanacağımız REST servisimizin adresini aşağıdaki gibi tanımlayalım.
private baseUrl = "https://my-json-server.typicode.com/typicode/demo/posts";
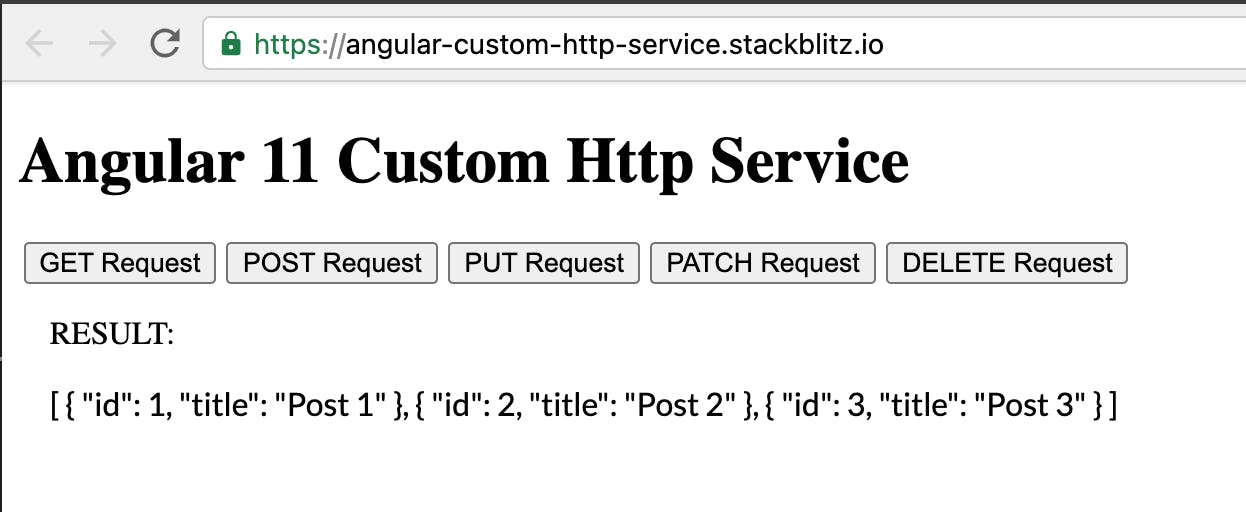
Şimdi methodlarımızın tanımına geçebiliriz. İlk olarak onGetRequest methodunu hazırlayalım.
  public onGetRequest(): void {
    this.customHttpService
      .makeGetRequest<PostResponse[]>(this.baseUrl)
      .subscribe(
        response => (this.result = response),
        error => console.log("get error:", error)
      );
  }
Bu methodu kullandığımızda örnek REST servisimizde tanımlı olan kayıtların geldiğini ve servisimizi kullanırken tanımını yaptığımız PostResponse modeline göre maplendiğini sonucu görebiliriz.
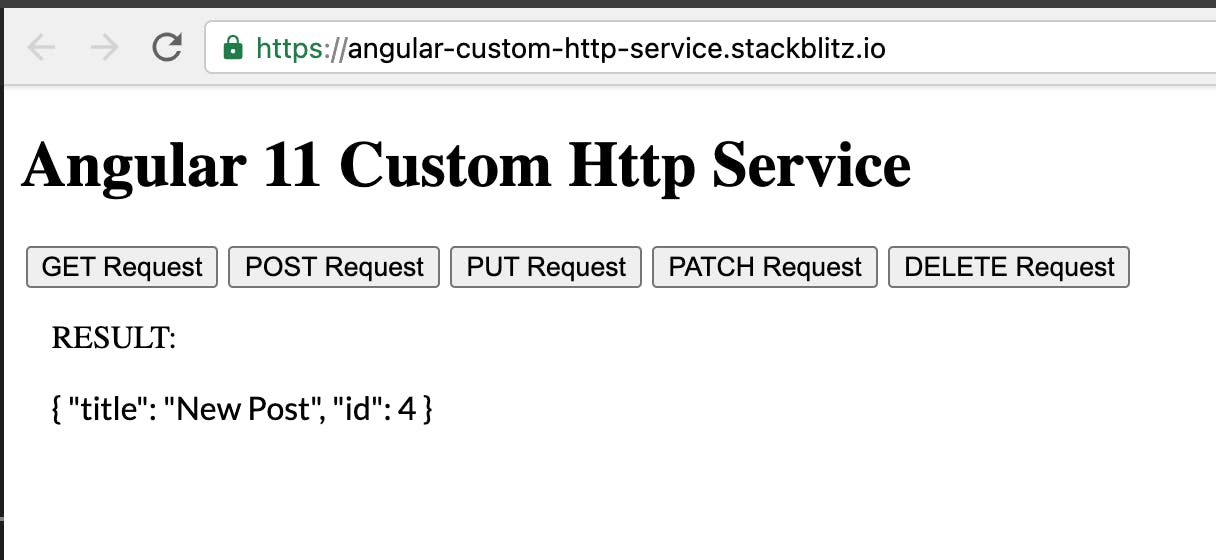
Şimdide sıradaki methodumuz olan onPostRequest methodu ile örnek servisimize bir kayıt atalım ve kayıt sonrası bize gelen sonuca bakalım. Sisteme yeni bir kayıt attığımız methodun tanımı aşağıdaki gibidir.
  public onPostRequest(): void {
    const body = new PostRequest("New Post");
    this.customHttpService
      .makePostRequest<PostResponse>(this.baseUrl, body)
      .subscribe(
        response => (this.result = response),
        error => console.log("post error:", error)
      );
  }
Kayıt işlemi sonrası yeni oluşan 4 numaralı id ye sahip sonuç aşağıdaki gibidir.
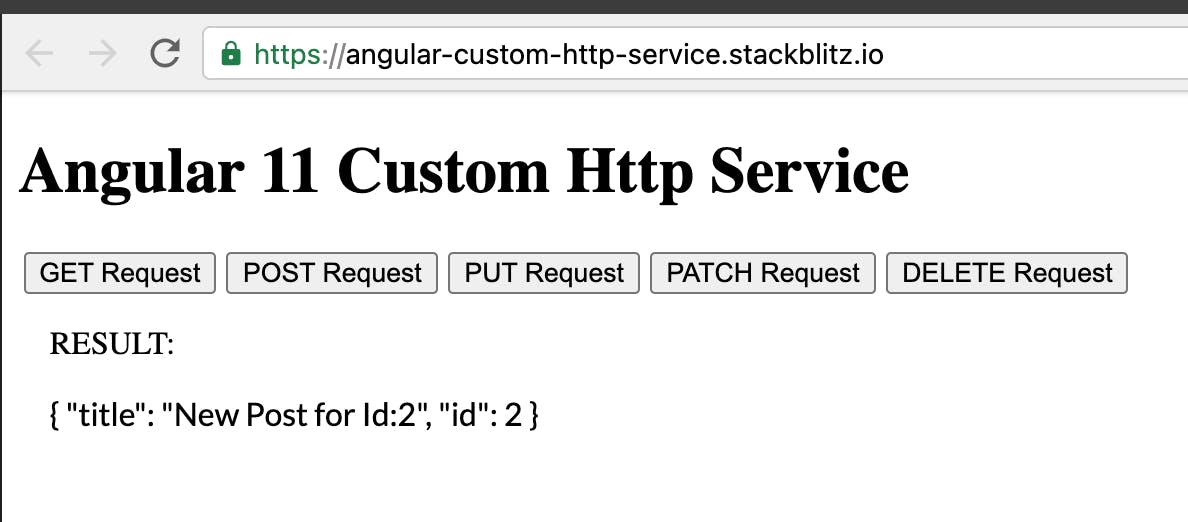
Şimdi sırada bir sonraki methodumuz olan onPutRequest methodu ve onun tanımı ile kullanımı sonucu oluşan kaydı göreme aşaması var. Bu methodu test etmek için örnek servisimizde tanımlı olan 2 nolu id ye sahip kaydın title bilgisini değiştirelim. Method tanımı aşağıdaki gibi olacaktır.
  public onPutRequest(): void {
    const body = new PostRequest("New Post for Id:2");
    this.customHttpService
      .makePutRequest<PostResponse>(`${this.baseUrl}/2`, body)
      .subscribe(
        response => (this.result = response),
        error => console.log("put error:", error)
      );
  }
Bu methodu çalıştırdığımızda daha önce "{ "id": 2, "title": "Post 2" }" değerine sahip kaydımızın sonucu ise aşağıdaki gibi oluyor.
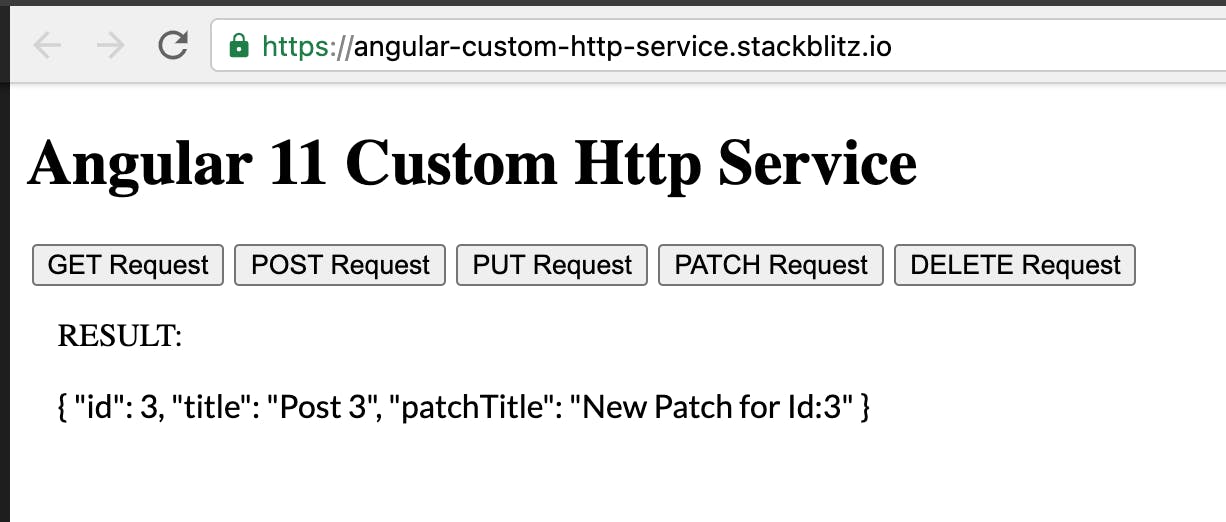
Sırada bir sonraki methodumuz olan ve kaydı güncellememize yarayan onPatchRequest methodu ve onun tanımı var. Bu method içinde ise özel bir request tanımı mevcut. Patch işlemi için 3 nolu id ye değişiklik olarak yeni bir alan olan patchTitle bilgisinin eklemesini yapacağız.
 public onPatchRequest(): void {
    const body = { patchTitle: "New Patch for Id:3" };
    this.customHttpService
      .makePatchRequest<PostResponse>(`${this.baseUrl}/3`, body)
      .subscribe(
        response => (this.result = response),
        error => console.log("patch error:", error)
      );
  }
Method kullanımı sonrasında ise 3 nolu kaydımızın son hali aşağıdaki gibi olacaktır.
Geldik artık en son methodumuz olan onDeleteRequest methodunun tanımı ve kullanımına. Bu method ile örnek sistemimizde kayıtlı olan 1 nolu id ye sahip kaydımızı sileceğiz.
  public onDeleteRequest(): void {
    this.customHttpService
      .makeDeleteRequest<PostResponse>(`${this.baseUrl}/1`)
      .subscribe(
        response => (this.result = response),
        error => console.log("delete error:", error)
      );
  }
Method kullanımı sonrasında kaydımız silindiği için dönen sonuç aşağıdaki gibi olacaktır.
Tek tek incelediğimiz tanımları ve kullanım sonrası sonuçlarını gördüğümüz methodların hepsinin tanımı olan app.component.ts dosyamızın içeriği aşağıdaki gibidir.
//app.component.ts
import { Component, VERSION } from "@angular/core";
import { PostRequest } from "./models/post-request";
import { PostResponse } from "./models/post-response";
import { CustomHttpService } from "./services/custom-http.service";

@Component({
  selector: "my-app",
  templateUrl: "./app.component.html",
  styleUrls: ["./app.component.css"]
})
export class AppComponent {
  private baseUrl = "https://my-json-server.typicode.com/typicode/demo/posts";
  public title = `Angular ${VERSION.major} Custom Http Service`;
  public result;

  constructor(private customHttpService: CustomHttpService) {}

  public onGetRequest(): void {
    this.customHttpService
      .makeGetRequest<PostResponse[]>(this.baseUrl)
      .subscribe(
        response => (this.result = response),
        error => console.log("get error:", error)
      );
  }

  public onPostRequest(): void {
    const body = new PostRequest("New Post");
    this.customHttpService
      .makePostRequest<PostResponse>(this.baseUrl, body)
      .subscribe(
        response => (this.result = response),
        error => console.log("post error:", error)
      );
  }

  public onPutRequest(): void {
    const body = new PostRequest("New Post for Id:2");
    this.customHttpService
      .makePutRequest<PostResponse>(`${this.baseUrl}/2`, body)
      .subscribe(
        response => (this.result = response),
        error => console.log("put error:", error)
      );
  }

  public onPatchRequest(): void {
    const body = { patchTitle: "New Patch for Id:3" };
    this.customHttpService
      .makePatchRequest<PostResponse>(`${this.baseUrl}/3`, body)
      .subscribe(
        response => (this.result = response),
        error => console.log("patch error:", error)
      );
  }

  public onDeleteRequest(): void {
    this.customHttpService
      .makeDeleteRequest<PostResponse>(`${this.baseUrl}/1`)
      .subscribe(
        response => (this.result = response),
        error => console.log("delete error:", error)
      );
  }
}
Artık bu örnek kullanım senaryosuna ve hazırlanan kodlara göre sizde ihtiyacınız olan benzer bir http servis tanımı yapabilir, benim bu örneğimde kullanmadığım başka senaryolara göre de kendiniz genişletme özelleştirme yapabilirsiniz. Örneğin bir error handling durumunu ya da bir header ekleme işlemlerini de bu servisimizin içine ekleyip, projemizde http kullandığımız her noktada yeniden header ekleme ya da error handling işlemleriyle uğraşmadan bu custom http servisimiz sayesinde tek noktadan kontrol edip yönetebiliriz.
Örnek kullanıma ait projeyi aşağıdaki stackblitz linki üzerinden erişebiliriniz.