


Merhaba,
Bu yazımda Angular da bir interceptor nasıl tanımlanır ve nasıl kullanılır onu inceleyelim. Angular da interceptorları bir nevi trafik polisi olarak düşünebiliriz, uygulama içinde yapılan istek ve cevaplarda araya girerek gerekli yönlendirme, log atma ya da gelip giden verilere değer ekleme gibi işlemleri yapabiliriz yani trafiği yönetebiliriz.
Interceptor kullanımını test etmek için ilk olarak bir servis oluşturalım ve bu servisi kullanarak my-json-server adresinden demo için kayıtları çekelim. Servis için projemizde src/app altında services isimli bir klasör açıp içine aşağıdaki servis kodumuzu ekleyelim. Kullandığım servis kodunu daha önce yazdığım Angular custom http service hazırlama yazımda detaylı olarak inceleyebilirsiniz.
// http.service.ts

import { HttpClient, HttpResponse } from '@angular/common/http';
import { Injectable } from '@angular/core';
import { Observable } from 'rxjs';
import { map } from 'rxjs/operators';

@Injectable({ providedIn: 'root' })
export class HttpService {
  constructor(private httpClient: HttpClient) {}

  public makeGetRequest<T>(url: string): Observable<T> {
    return this.httpClient.get<T>(url, { observe: 'response' }).pipe(
      map((res: HttpResponse<T>) => {
        return res.body;
      })
    );
  }

  public makePostRequest<T>(url: string, body?: any): Observable<T> {
    return this.httpClient.post<T>(url, body, { observe: 'response' }).pipe(
      map((res: HttpResponse<T>) => {
        return res.body;
      })
    );
  }

  public makePutRequest<T>(url: string, body?: any): Observable<T> {
    return this.httpClient.put<T>(url, body, { observe: 'response' }).pipe(
      map((res: HttpResponse<T>) => {
        return res.body;
      })
    );
  }

  public makePatchRequest<T>(url: string, body?: any): Observable<T> {
    return this.httpClient.patch<T>(url, body, { observe: 'response' }).pipe(
      map((res: HttpResponse<T>) => {
        return res.body;
      })
    );
  }

  public makeDeleteRequest<T>(url: string, body?: any): Observable<T> {
    return this.httpClient
      .request<T>('delete', url, {
        body,
        observe: 'response'
      })
      .pipe(
        map((res: HttpResponse<T>) => {
          return res.body;
        })
      );
  }
}
Servisimizi hazırladığımıza göre şimdide yukarıda belirttiğim adresten örnek verilerimizi çekelim. Bu aşama için app.component.ts içine gerekli methodumuzu yazalım ve app.component.html içinde de verilerimizi gösterelim. İlk olarak component içinde yeni hazırladığımız servisimizi ekleyip daha sonra da bir method ile gerekli isteğimizi yapalım. Düzenlemelerden sonra component içeriğimiz aşağıdaki gibi olacaktır.
//app.component.ts

import { Component, VERSION } from '@angular/core';
import { HttpService } from './services/http.service';

@Component({
  selector: 'my-app',
  templateUrl: './app.component.html',
  styleUrls: ['./app.component.css']
})
export class AppComponent {
  public title = `Angular ${VERSION.major} Custom Interceptor Usage`;
  public customData: string;

  constructor(private httpService: HttpService) {}

  public getCustomData(): void {
    this.httpService
      .makeGetRequest('https://my-json-server.typicode.com/typicode/demo/posts')
      .subscribe(response => (this.customData = JSON.stringify(response)));
  }
}
İstek sonucu gelen veriyi göstermek içinde html içindeki değişikliği yaptığımızda sayfamızın kodu aşağıdaki gibi olacaktır.
<!-- app.component.html -->

<h1>{{title}}</h1>


<button (click)="getCustomData()">Get Custom Data</button>
<h3>Custom Data:</h3>
{{customData}}
Artık uygulamamız hazır, istediğimiz servisten verilerimizi çekebiliriz. Şimdi bu uygulamıza interceptor yapımızı ekleyelim ve yaptığımız istekleri loglayalım ve yaptığımız isteklerin header bilgisine değer ekleyelim. İlk olarak projemizde src/app altına interceptors isimli bir klasör açalım ve ihtiyacımız olan interceptor tanımlarını buraya ekleyelim. Bu işlem için iki adet interceptor eklemesi yapacağız, bunlardan birisi ile yaptığımız istekleri loglayım, diğeri ile de isteğimimizin header kısmına bilgi ekleyeceğiz. Interceptor içinde yapılan işlemi loglamak için daha önce yazdığım storage-function npm paketinide kullanacağım. İlgili paketi yüklemek için aşağıdaki komutu kullanabilirsiniz.
npm i storage-function
Projemizde gerekli yüklemeyi de yaptıktan sonra aşağıdaki gibi interceptor tanımlarımızı ekleylim. Log işlemleri için log.interceptor dosyamızı hazırladık.
// log.interceptor.ts

import {
  HttpEvent,
  HttpHandler,
  HttpInterceptor,
  HttpRequest
} from '@angular/common/http';
import { Injectable } from '@angular/core';
import { Observable } from 'rxjs';
import { storageFunction } from 'storage-function';

@Injectable()
export class LogInterceptor implements HttpInterceptor {
  intercept(
    req: HttpRequest<any>,
    next: HttpHandler
  ): Observable<HttpEvent<any>> {
    storageFunction.toLocalStorage(`LogInterceptor_${req.url}`, req);

    return next.handle(req);
  }
}
İsteklerimize header eklemek için ise header.interceptor dosyamızıda hazırladık.
// header.interceptor.ts

import {
  HttpEvent,
  HttpHandler,
  HttpInterceptor,
  HttpRequest
} from '@angular/common/http';
import { Injectable } from '@angular/core';
import { Observable } from 'rxjs';
import { storageFunction } from 'storage-function';

@Injectable()
export class HeaderInterceptor implements HttpInterceptor {
  intercept(
    req: HttpRequest<any>,
    next: HttpHandler
  ): Observable<HttpEvent<any>> {
    storageFunction.toLocalStorage('HeaderInterceptor_before', req);
    const reqWithCustomHeader = req.clone({
      headers: req.headers.set(
        'Custom-Header',
        'Custom header value from interceptor'
      )
    });
    storageFunction.toLocalStorage(
      'HeaderInterceptor_after',
      reqWithCustomHeader
    );
    return next.handle(reqWithCustomHeader);
  }
}
Tanımlamalarımız hazır olduğuna göre şimdi en önemli kısım olan interceptorlarımızın uygulamamız içinde kayıt edilmesine, app.module.ts içindeki providers array içinde tanımladığımız interceptorlarımızı ekleyelim. Buradaki önemli nokta ise interceptorların bu array içine eklendikleri sıra ile çalışmasıdır. İlk olarak hangi interceptor çalışması isteniyor ise ona göre sıralama yapmak gerekir. Benim yaptığım tanımda ilk önce yaptığımız istek için log atılacak, sonrasında ise isteğimiz üzerine header eklemesi yapılacak, bu işlem için yapılan tanım sonrası app.module içeriği aşağıdaki gibi olacaktır.
// app.module.ts

import { NgModule } from '@angular/core';
import { BrowserModule } from '@angular/platform-browser';
import { FormsModule } from '@angular/forms';
import { AppComponent } from './app.component';
import { HttpClientModule, HTTP_INTERCEPTORS } from '@angular/common/http';
import { LogInterceptor } from './interceptors/log.interceptor';
import { HeaderInterceptor } from './interceptors/header.interceptor';

@NgModule({
  imports: [BrowserModule, FormsModule, HttpClientModule],
  declarations: [AppComponent],
  providers: [
    { provide: HTTP_INTERCEPTORS, useClass: LogInterceptor, multi: true }, // ilk çalışacak olan interceptor
    { provide: HTTP_INTERCEPTORS, useClass: HeaderInterceptor, multi: true } // ikinci olarak çalışacak olan interceptor
  ],
  bootstrap: [AppComponent]
})
export class AppModule {}
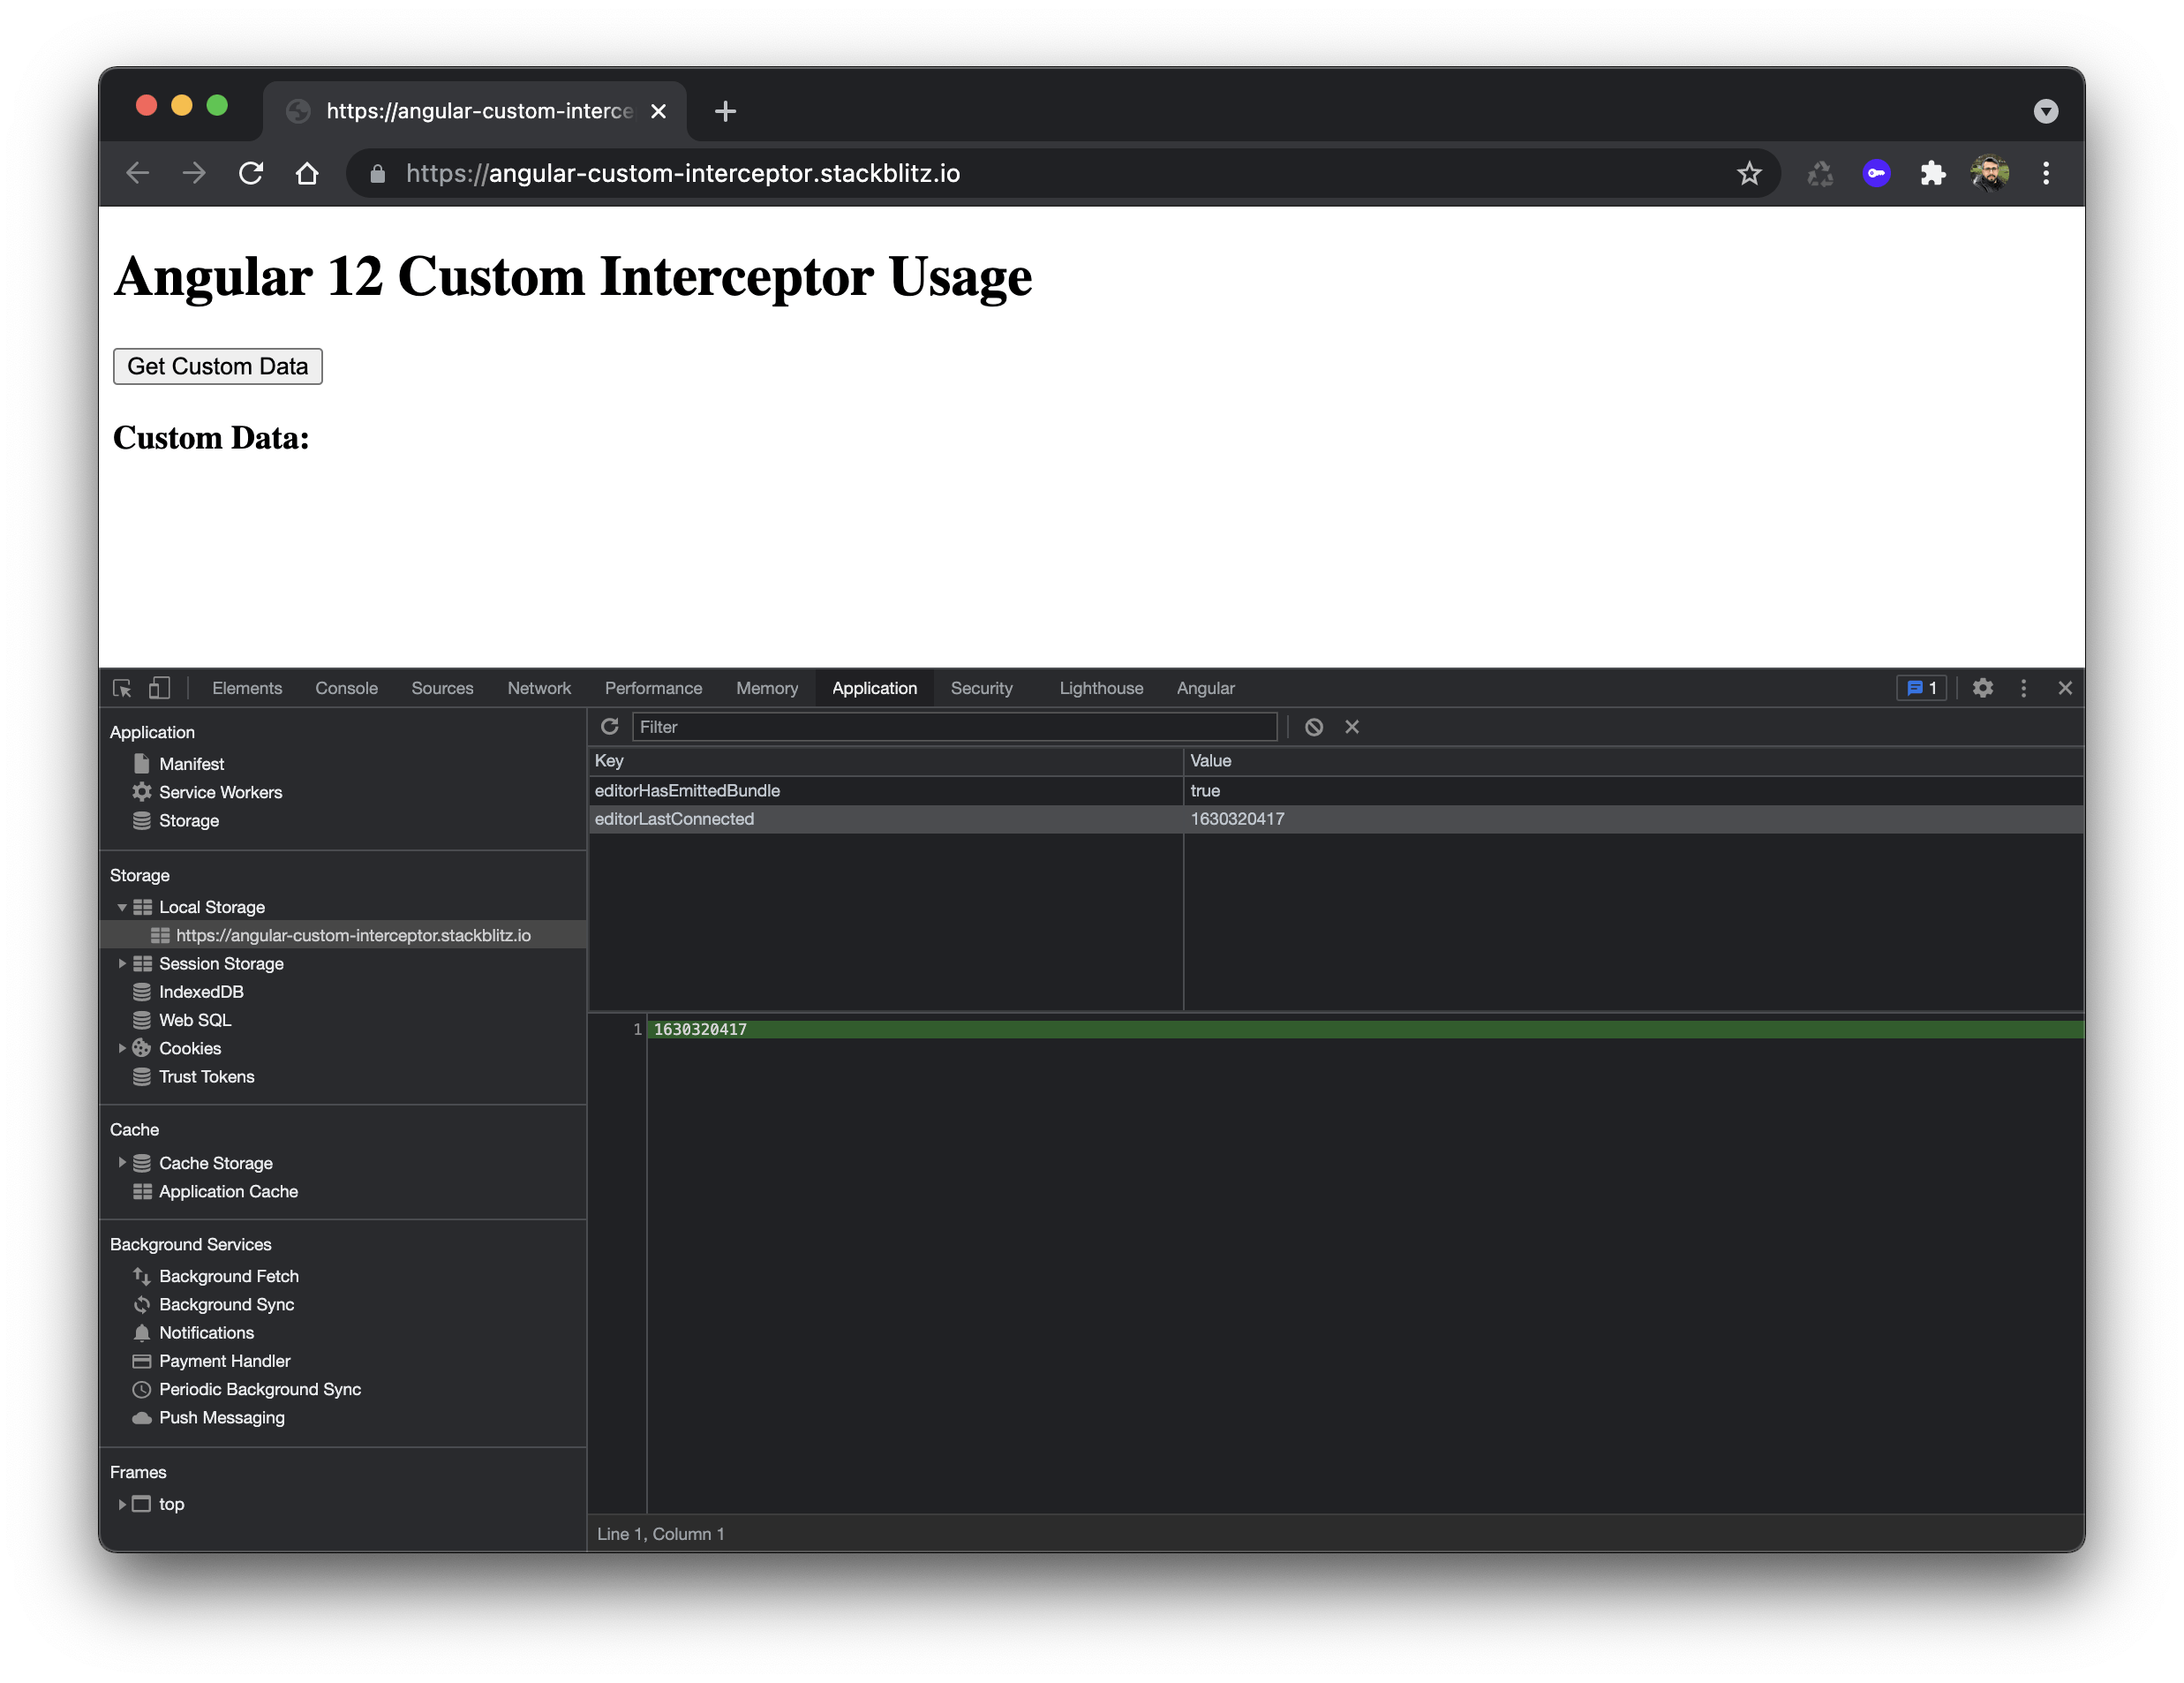
Hazırlıklarımız bitti şimdi uygulamamızın çalıştığında oluşan kayıtlara birlikte bakalım. Uygulamamız çalıştığında görüldüğü gibi local storage da herhangi log kaydı bulunmuyor.
Get Custom Data butonuna basıp ilk isteğimizi yaptığımızda ise interceptor tarafından oluşturulan log kayıtlarını görebileceğiz.

Ekran görüntüsünde görülen LogInterceptor_my-json-server.typicode.com/typicode/demo/p.. key bilgisine sahip kayıt LogInterceptor tarafından eklendi. HeaderInterceptor_before key bilgisine sahip kayıt ise HeaderInterceptor tarafından header eklenmeden önceki istek bilgilerimize ait kayıt olarak eklendi. HeaderInterceptor_after key bilgisine ait kayıt ise yine HeaderInterceptor tarafından isteğimize header bilgisi eklendikten sonraki durumuna ait bilgilerle log olarak eklendi.
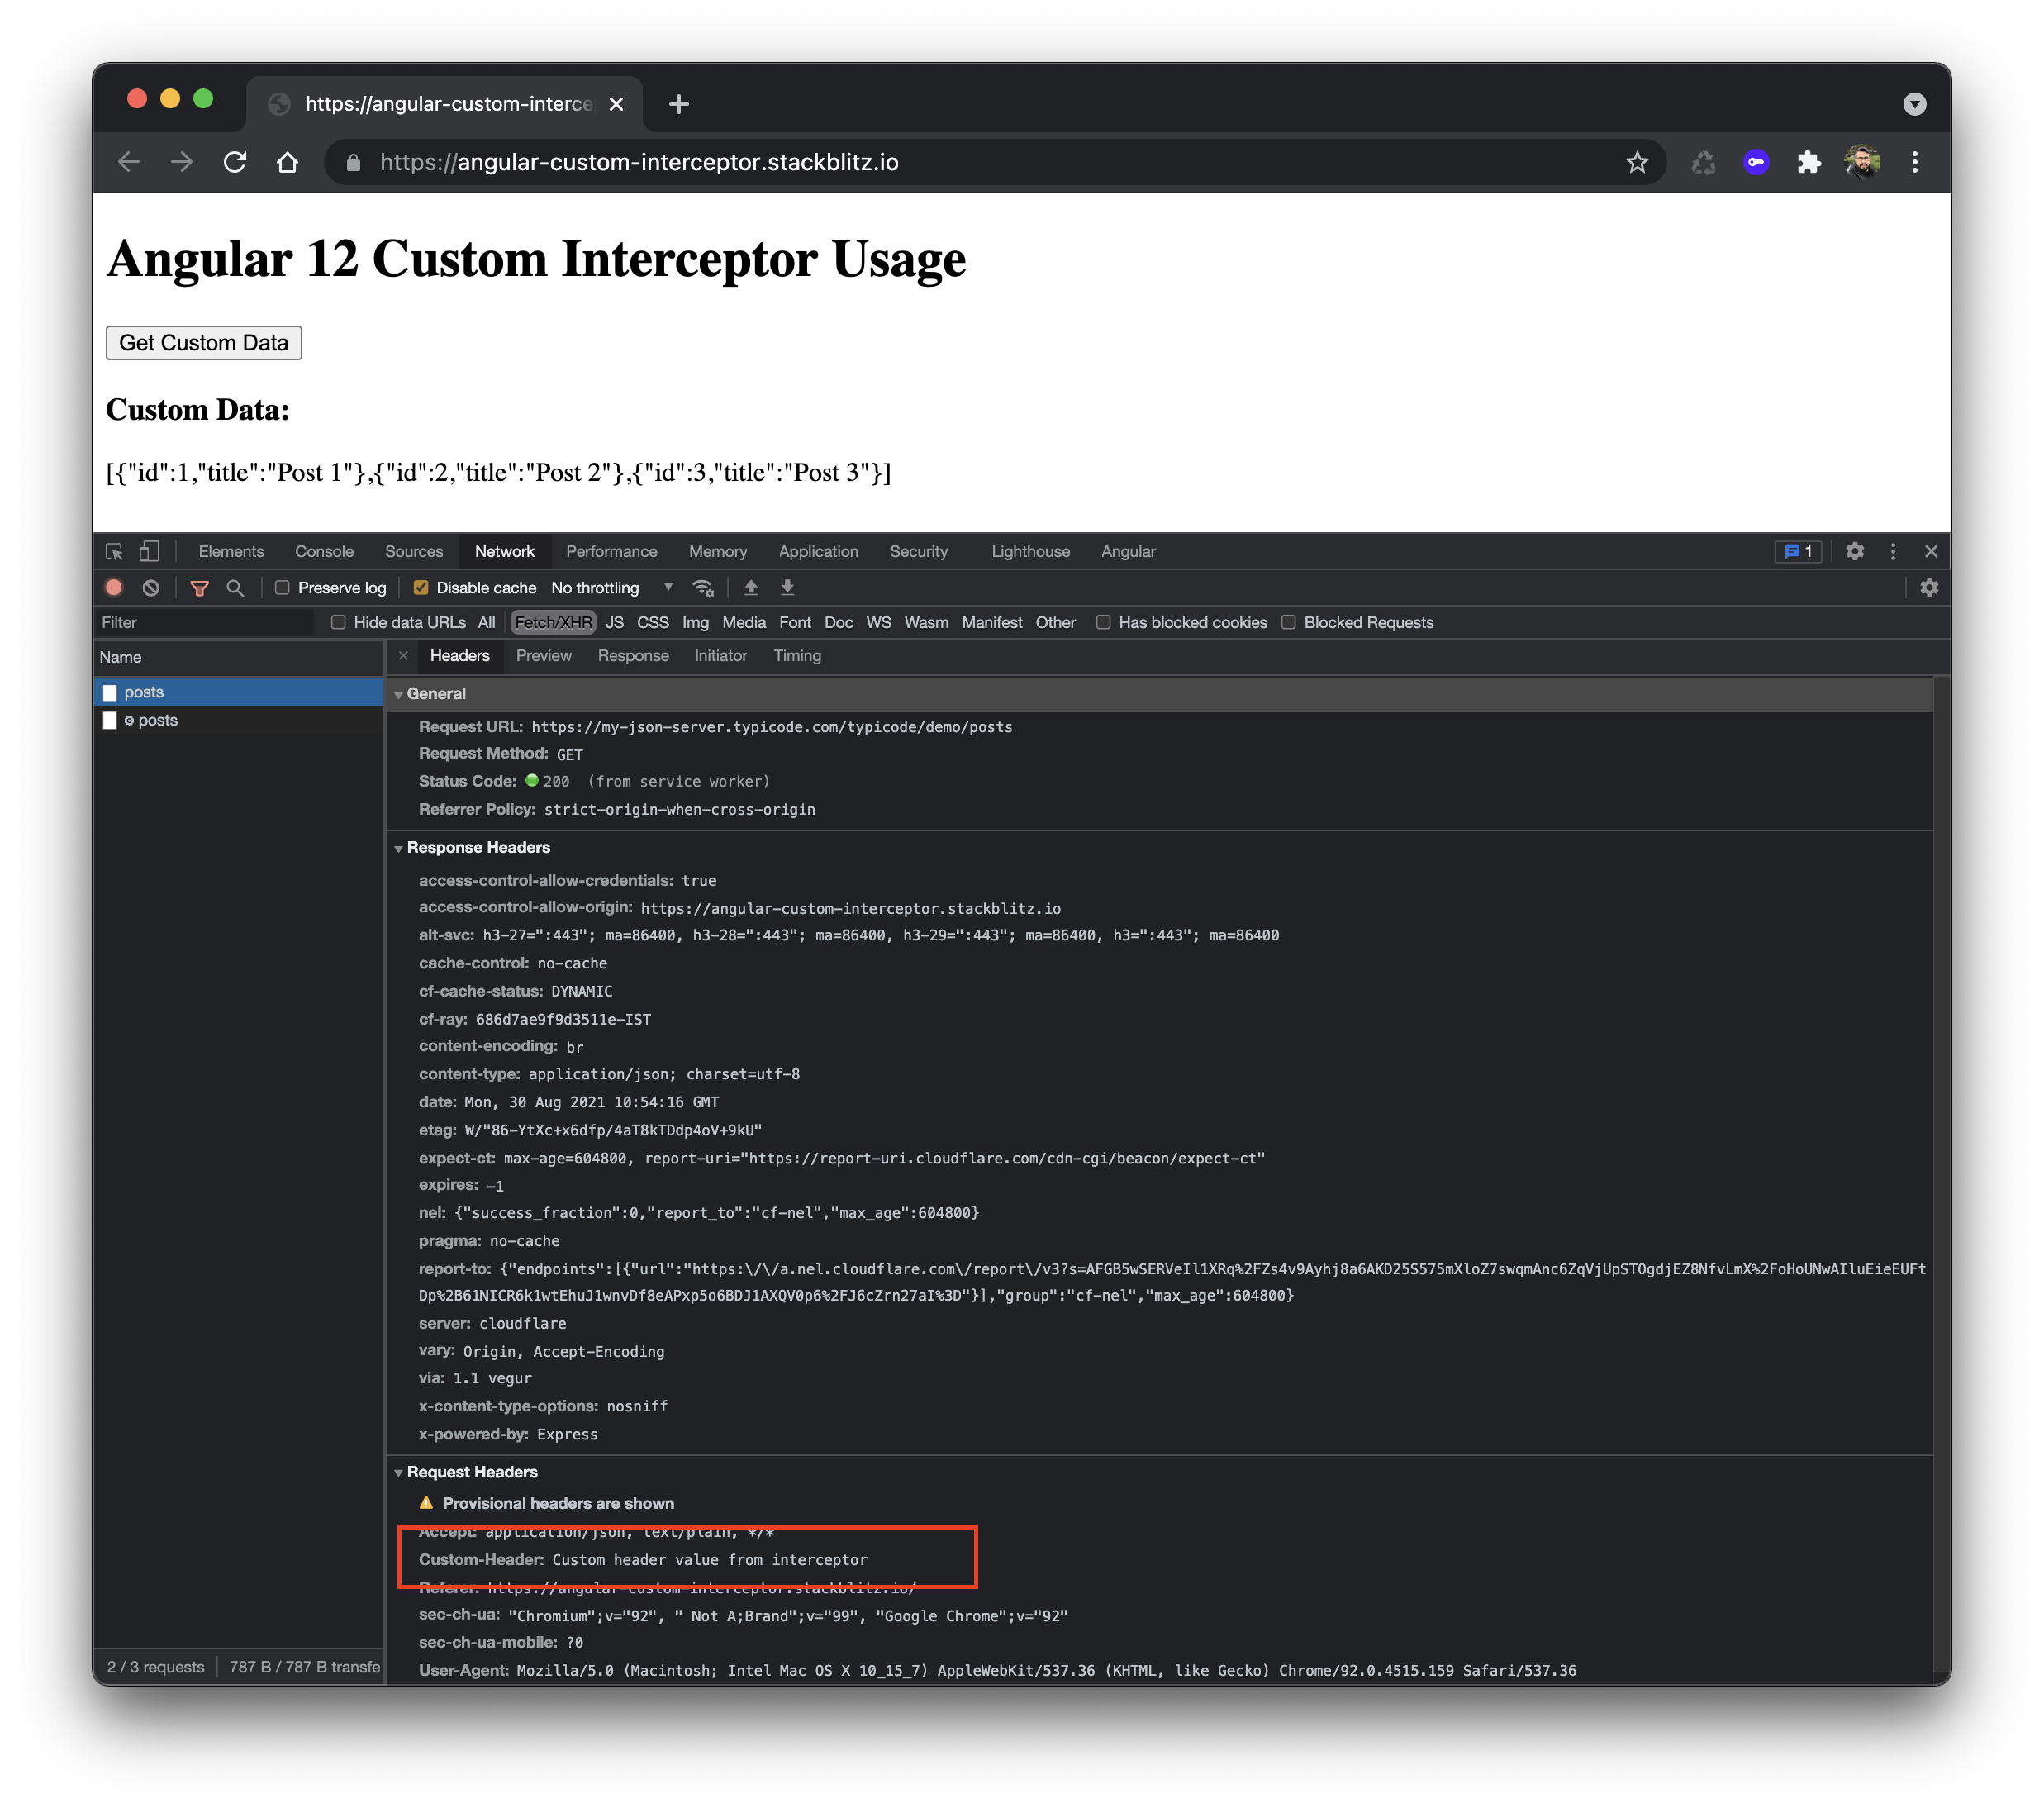
Yapmış olduğumuz isteğimizi incelediğimizde ise interceptor tarafından eklenen header bilgisini görebiliriz.
Bu tarz interceptor kullanımları ile sizde uygulamanızda istediğiniz gibi isteklerinizi kontrol edip yönetebilirsiniz. Bu yazıda yaptığımız gibi ister log atma işlemi, ister header bilgisine yeni veri ekleme ya da daha farklı kullanım senaryonuza göre istediğiniz özelleştirmeleri yapabilirsiniz.
Proje ait StackBlitz ve GitHub linklerine aşağıdan erişebilirsiniz.